Showing posts with label Rosehip. Show all posts

Sunday, 8 July 2012

Crochet Flower Throw

The "Flowery Throw" was one of the politer terms my family called this, my first, crochet throw. When I started it in Spring 2009 I was working silly hours running my own business and I really didn't have the time or energy to do anything for myself.
Flower Throw
Flowery Throw and Simple Border
One day I came across the lovely Rosehip Blog (where the sideways distraction of my pillowcase edging also originated) and Beata's crocheted Flower Square caught my eye. I had some acrylic double knit around the house, and a crochet hook so out of interest I crocheted up my first square to see if I could remember how to crochet, the last time was in my teens making granny squares so at least 25+ years ago. I stopped crocheting as there was nothing inspiring pattern wise back then, I remember spending weeks trying to find a pattern somewhere, anywhere, to crochet a sweater, to no avail. Doilies, lace and tablecloths were your lot!
A bit like riding a bike though, you don't forget. Every now and then I would make a little flowery square, every little square had 6 ends. Mostly I crocheted in the car or on the annual family holiday in France. I would make 20 squares in a 2 week spurt, and then none for six months. They lived in a basket and gathered dust, every now and then eyeballs were rolled!

I sold my business last year (I managed to get out quits so no I am not rolling in it....) and started to search for work, the good part was that I finally had some "me" time and I picked up my knitting needles again and finished an aran jacket at the end of the winter. That was an achievement, no problem knitting then! After that triumph I taught myself to knit socks and a couple of simple shawls as presents (with too many mistakes) and I declared myself a yarn addict again after so many years.


I spied my UFO (UnFinished Objects in the crafting world lingo) squares and decided to put my mind to finishing the blanket. At that point I had 60 squares, and 360 ends.
360 ends!!

So I sat down and made myself sew in those ends, and then every six squares I sewed in the ends.

If you stay on top of the ends life is so much better and you don't put off making more squares as you're dreading the ends!!

End of ends.....I have learnt my lesson. Never will I let my ends build up again.
My squares curled though, opinion on Ravelry was that you don't need to block acrylic, so I didn't. I decided I needed a couple more colours of yarn (Stylecraft Special DK) and bought some darker blue, bright yellow and mint green and bemused myself working out permutations and combinations of how many squares I need to do to have all the variations, if there are 10 colours and 3 positions for each colour. That size blanket was too big!

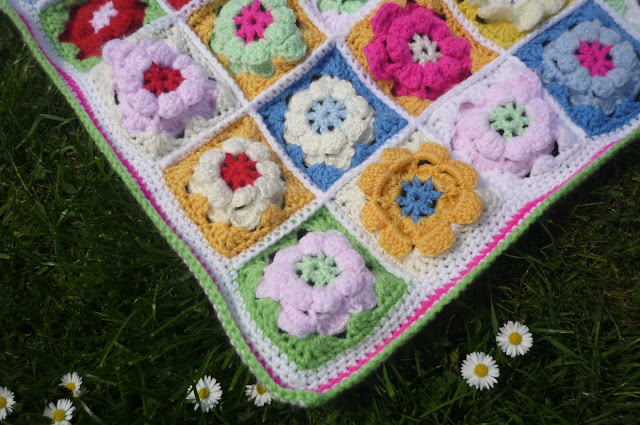
...and we had nice weather back in March and April and I did some crocheting outside, bliss! I decided I would just double crochet (US single crochet) the squares in strips using white and then join the strips in the same way. I stopped at 180 squares (15x12), it's not a large blanket at all after all that effort as each square is only about 8cm (3") 
 It's easier said than done laying out a random pattern, I didn't really succeed as I must have swapped some of my carefully labelled piles as I do have the same colour flowers together in a couple of places.
 We had sun back in May when I was edging! The edging was very quick and painless.
I did have a dither, as you can see the flowers pop one way better than the other but that seemed to me to be the wrong side, so I joined with the curled edge towards me and the white border is now really the wrong side and I wanted that to be the right side, but it's not really a problem as the other side looks good too.
Edging is 3 rounds of double crochet in white, 1 in fucsia, 1 white, 1 lime green, so 6 in total. You can see the difference between the wrong right side and the right wrong side....no I have no idea either which is which so it doesn't really matter!
I've taken these pics today with the vivid setting on my camera, and close up for some of them (the flower macro setting)
crochet flower blocks
Oh look wonky basket under bench in conservatory has coat hangers in for the washing.  I can't do staged photos!
 The flowers do pop better on the wrong side.
 Only one more photo honest!

Flowery Throw finished 25th May 2012, took over three years but less than 2 months once I put my ar*e into gear!

FINISHED SIZE: approx 120x105cm (47"x41") each square around 3" Cot size but not intended for a cot. It's over the back of the bench in the conservatory.
YARN:  A ball each Pale blue, darker blue, lime green, mint green, pale pink, shocking pink, pale yellow, dark yellow, red, cream and a couple of balls of white. All 100% acrylic DK, no idea of usage as I already had most of it. Recommend Stylecraft Special DK.

HOOK SIZE4mm

PATTERN: Flower Square

HAPPY HOOKY INDEX: 7/10

PS I now realise how lovely Stylecraft Special DK is for a very economical 100% acrylic yarn, the other colours were stiff and squeaky but the Stylecraft is soft and light and feels like it has some cotton in.  Since there are 50+ colours in the Stylecraft range guess what the next project will be made with? No prizes...

PPS Thank you for humouring me by reading it all and apologies for picture overload. I have been messing about with camera settings.

Monday, 2 July 2012

Crochet Pillowcase Edging

Surfing blogs is a dangerous activity. An activity that results in  spending more time getting distracted by, than actually creating the projects that they inspire! You also end up with a list of "want-to-do" projects a mile long, and as I am  an unorganised blog follower/ bookmarker, I know I have seen an idea somewhere and when I come to find it even more hours are pleasantly wasted getting distracted by even more "must make" ideas!

In this case though, I knew I had seen an idea and I knew where it was. I was in the middle of a three year epic, making a flowery crocheted throw which will be the topic of another "catch up" post soon.  The pattern for the throw I had bookmarked, but in doing so I also spied the lovely pillowcases Beata sells in her Etsy shop on her Rosehip blog. Trouble is you then want to make them yourself and not buy them!  I know wanting is bad, but making your wants makes it OK, doesn't it? Back then I didn't have the time, or know about Ravelry, the most amazing and by far the best knitting and crochet resource on the web. You can find any pattern in the yarn world on Rav!

So I did a Rav pattern search for crochet on "pillowcase edging" and there was a perfect pattern from Cassie at You Go Girl, and Cassie had kindly posted free tutorials. I bought one ball of Rowan Hand Knit cotton, at vast expense, in a gorgeous light olivey green (Celery) shade to coordinate with the IKEA Cath Kidston Rosali pillowcases I had, from buying the material for the Sweet 16 quilt in my first post. Even better, Cassie also acknowledges the inspiration for her design came from the Rosehip Blog, and that is how the love in the blog world goes round!

So I am contemplating edging some pillowcases for said "Sweet 16 (sic) daughter.  


The worst bit by far was straightening out the 15 x "width of pillowcase" length of yarn for blanket stitching, boy did it twizzle. Fifteen times the width, for goodness sake that breaks all the rules of "no longer than half an arm's length" we were taught!!!! It probably took me a couple of hours to do the blanket stitching around the edge as the foundation for the crochet edging, using doubled yarn, and although I thought it was too loose it turns out it should have been looser again as it did pucker when finished.
The crocheting was fine, a lovely straightforward tutorial from Cassie, but I should have searched out a 3.75mm hook as she advised, I was lazy and a 4mm was what I had to hand! I made this on a hot summer’s evening watching the Eurovision Final.
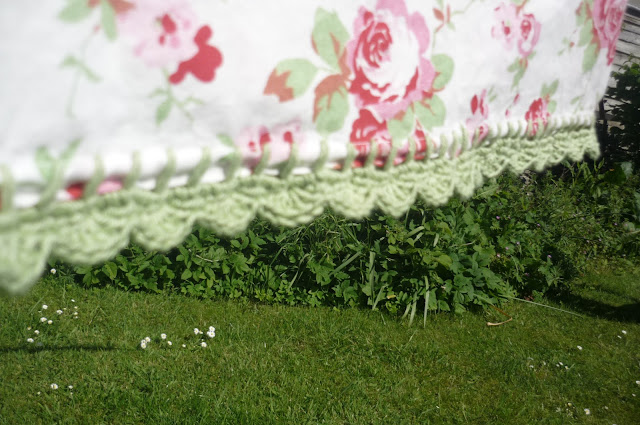
So here is the not very perfect first one, that blanket stitch has to be positively baggy!
Practice makes nearly perfect, the second attempt was much faster and easier, isn't that always the case? I am trying!! The Rowan 100% cotton yarn I used is a bit stiff, I think a softer one would be easier to work, perhaps a bamboo mix as advised.
Back at the end of May the weather was nice..... so I could mess about outside trying to take a decent photo.
...and a close up
This one is better, and many apologies if daisies and buttercups on the lawn offend you, I love them and they are one of the few things that grow for me.
Crochet Pillowcase Edging
The family were rather bemused by the uselessness of my creation but so what..... a touch of "just because you can" every now and then is good for the soul.
...and finally..... I "just" managed 2 pillowcases out of an 85m hank of yarn with 1m spare, so it may be better to go with a slightly bigger ball and/or a slightly lighter weight to be on the safe side if you're after a pair.
Related Posts Plugin for WordPress, Blogger...